Wednesday, April 03, 2024

Springtime Spinning and Winding Wool

It's sheep-shearing time here in the Bluegrass, and I am helping my friend Sarah to shear sheep, including our Shetlands, Lana and Nina.

Lana, Nina, and Liam at the hay rack,
late winter. Lana and Nina live with Liam
on my friend Sarah's farm and she took this photo.
The sheep in the background are her Soays. Liam is 
hers, too...and Lana and Liam are always together.

That put me into the wool spinning mood, so I've been using the old Eastern European supported spindle to spin more yarn for the years-long project to make blankets for the twins.

The Eastern European spindle,
which was hand-turned on a 
lathe who knows how long ago.

Given that to date the project has involved shearing the sheep, picking the fleece, scouring the fleece in warm soapy water, drum-carding the wool, and spinning the wool, I measure progress in years. A few years ago I sent several fleeces to two mills to be made into roving, so I could skip the cleaning process, but haven't spun more than a few yards of that.

Now I have several thousand yards, enough to weave a small blanket, and need that much again for the second one.

Here is the spindle-spun wool.

114 yards of hand-spun wool from the spindle

Here is a 185-yard skein spun on the Polish Kromski wheel. The wheel-spun wool is a little more consistent in feel, but not by much.

Comparison with my wheel-spun wool

Given that progress is in fits and starts, we have years ahead. :)


Here I am winding a spindle full of yarn onto the yarn swift my dad and I made years ago. One full revolution is 1 yard of yarn. 

Yarn swift from the top...

...and the side.

The swift comes apart into pieces to make storage easier.

Yarn swift in pieces.

Happy springtime, everyone!

I have a post about some transition stays almost ready...

Thursday, January 11, 2024

10 Years to Finish a Regency Reticule? Well, Yes

A Christmas gift? No, a Christmastime project.

Sometime in 2014, during the lilac-colored silk phase in which I made an embroidered 1790s sleeveless spencer, matching outer petticoat, and pearled headband after an original, I started a beaded reticule project. It stalled and was picked up and dropped again during the following decade, and only now have I finished it. During that time I went through several phones and it appears photos documenting the project's early days have gone missing, so the following is a somewhat truncated history of its making.

First, Why the Lack of Posts for So Long?

It's not for lack of making things, for I did manage a pair of 1790s stays, a velveteen spencer, and a pretty apron-front dress. Those projects, though, happened in short spurts that felt like shelter from repeated storms. There was another health situation, one in the long series that have punctuated the last 30 years, and then, the illness and passing of my darling and beloved father, followed months later by my sweet aunt. Last spring saw my sisters and I sharing taking 24-hour care of our daddy during his time in hospice and helping our stepmother/mother through, and then, the loss, the mourning... Losing a parent is a loss apart; it shakes the foundations. It's still too close for elegy, except to say that his community lost a dedicated volunteer and leader and we lost a mentor, a guide, a loving father and friend. Even now I can hear his voice.

The Finished Reticule

Nuts, I don't want to write again, but, he thought hobbies were key to mind and soul, so, let's go. Here is the completed reticule. It measures 9 inches at its widest by 9 inches tall and a measly 1.25 inches deep. It's deep enough to hold a small fan, a handkerchief, smelling salts and a phone. I suppose it's possible that you'd find lip gloss and some cash, too, were you to snoop. I wanted it big enough to be useful, but not big enough to become lumpy with the thinggummies that naturally accumulate in my own purse, for practicality and so I have the satisfaction of pulling out whatever's needed like a rabbit out of a hat when my sons or husband ask. Package of band aids, mini containers of sunscreen, lotion, and hand sanitizer, a pen, sunglasses, a scrap of paper for writing, a tiny measuring tape, lactose pills for the lactose-intolerant son, emergency migraine tablet, tissues, keys...all in the smallest package I can manage. Query: did Regency women do similarly? Were smelling salts part of a reticule's community of objects?

The front, natch

The back and the compound strap

The narrower-than-wanted interior

The reticule has stiff sides, courtesy interior cardboard on back and front, softened with millinery domette so that the surface doesn't feel harsh.

Intermission for Kitty Cuteness

"Why are you putting that thing on top of me?" asked Nutmeg,
who was on my lap.


How It Was Made

The shape is fairly common for the Regency period, interesting visually because most sides are at oblique angles. I saw an example in 2014 with similar beading and loved it. The photo once lost, I never found it or was able to track it down online again. Then, a year or so ago, one so like the original turned up in a favorite Etsy shop (GraceofTime) that it was quick like a bunny -- save the photo! Here it is.

Reticule from Graceof Time on Etsy: their photo

This reticule I think is padded, and soft-sided, and seems mostly to be beaded in white and silver, and the fabric may be a satin. Still, you see the resemblance.

I wanted flat sides as my other reticule gets so shapeless and lumpy when anything is put inside, plus the tailored look is attractive. Dangling beads were not to be thought of; a klutz, I'd catch a loop on something for sure and beads would fly.

The construction is invented because I'd no access to originals. It uses stitches common in the Regency period: back-stitching for strength, whipping of seams, hemming.

Materials

  • Exterior fabric: home-dyed silk shantung from Dharma Trading
  • Interior fabric: undyed silk shantung, ditto
  • Stiffener: cardboard from a discarded cereal box
  • Soft interlining: domette, I think from Judith M millinery in Shelbyville, KY
  • Beads: pearl seed beads, gold-interior clear sead beads: the color isn't warm
  • Embroidery silk: Au Ver a Soie silk ovale, a flat, untwisted filament silk (not spun and a joy to use)
  • Sewing thread: vintage British sewing silk in Heliotrope
  • Strap: tawny silk cord and silk tassels from a deconstructed remnant of antique passementerie whose connecting threads had shattered, from DuchessTrading on Etsy. The passementerie was too far gone to edge a gorgeous pillow, so...creative reuse.

The Beading

I drew the design on paper, then copied it on the home-dyed silk shantung. The fabric was tightened in an embroidery hoop: this sort of work cannot be easily done on fabric that isn't taut. Then I sewed the stems in elongated chain stitch.

Each beaded twig or frond was made in one go, by pulling the thread up through the fabric, loading the thread with the requisite number of beads, laying it flat, and running the needle back into the fabric. Then, with a second needle, couching down the longer threads every few beads as invisibly as possible. Otherwise, they became droopy and at risk of being pulled off.

The Assembly and Sewing

After beading the fabric, I sketched and cut out pattern shapes for the back, which included the foldover flap, and the front, which included an extra piece at the bottom to make the bottom a little deep, front to back. You know, for stuffing stuff into the purse. It's likely I cut out more than one pattern, to see which size felt most natural and useful.

Once happy with the pattern, the fashion fabric and lining were cut out, using generous 1-inch seam allowances.

I used a leftover breakfast cereal box, which is a single layer of cardboard, not terribly heavy, to cut a back (minus the foldover flap) and a front.

Lastly, I cut millinery domette according to the pattern pieces as a nice soft interlining to make the purse feel good to hold.

The lining for front and back were laid flat, the carboard laid atop, then the domette went on that, and the fashion fabric over all. The layers were pinned and basted securely in red thread so that I could easily see it to pull it out later.

You can see the three layers in the flap: fashion fabric, domette, lining. 

At this point there was a great deal of dithering and it's likely that the dithering precipitated one of the laying-aside periods. I had thought I was going to simply sew the front and back together. However, alert readers will envision me trying to reach into the reticule and finding it hard to insert more than a slip of paper, even with that excess bit at the bottom that was supposed to offer some room. Those hard sides didn't give. No room, no room at all! I'd need to add sides...

Eventually I determined to cut probably 2-inch wide pieces (1/2-inch seam allowance) to insert between front and back. At this remove I can't figure out what made me cut separate pieces for the long sides and the short sides, but that's what happened.

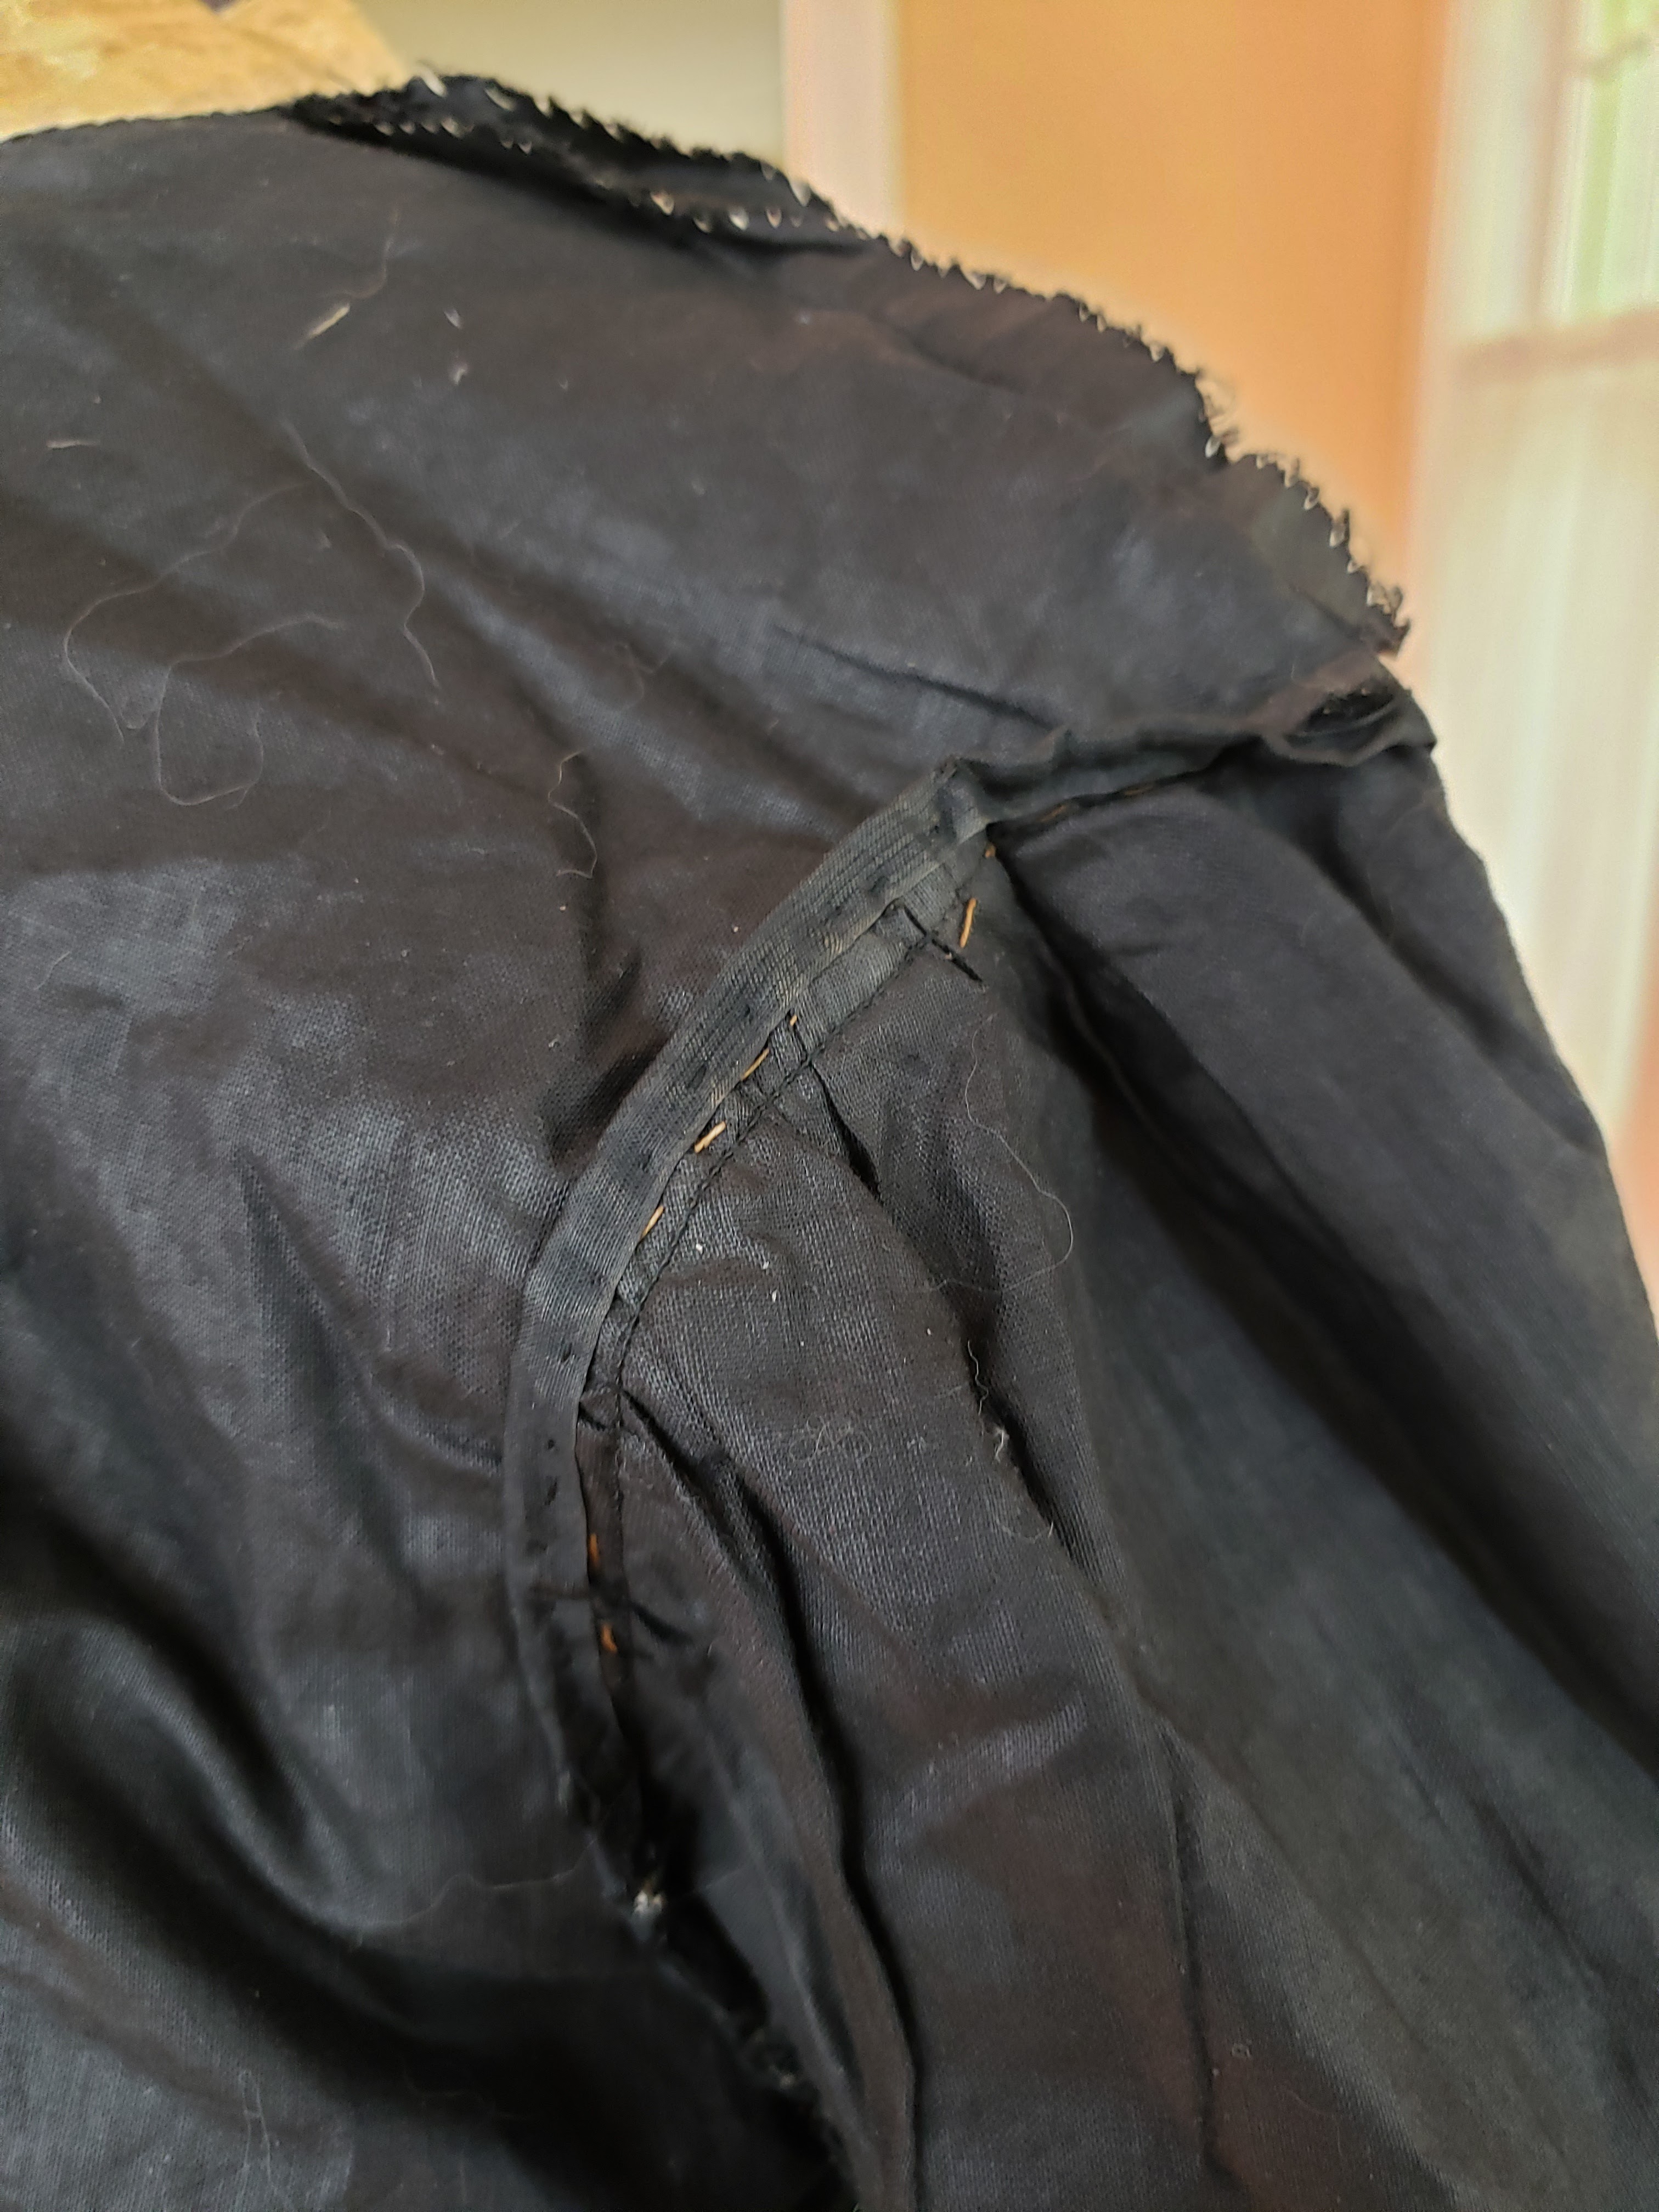
To seam the sides to the front and back, I chose to turn the seam allowances inward of all fabric pieces and whip them together with very close stitches, about 1/8 inch apart. This makes the seam stand in a little ridge, with little fabric bumps between each stitch that echo the beading. It's also good and strong. It does mean, however, that the interior lining has raw edges. The silk doesn't fray much at all, so am not concerned about that. I probably should have seamed up the lining separately and slipped it in, though...

Seaming together front and back. You can see the
side pieces have been whipped on to the front.

The fashion fabric, domette, and lining for the flap were laid together, then the fashion fabric seam allowance was turned in over the domette and basted. 

The strap, which is made up one long piece of cord folded into the three, was laid across the flap at the spot where it folds over from the back piece, and on top of the domette. The lining seam allowances were turned in, just a hair inside the fashion fabric so that it wouldn't show on the outside and laid atop. More basting to hold everything smooth. Puckering would have been fatal. That's too dramatic, of course, but by now it was at the end of 2023 and I didn't want to end on a whimper. The lining was carefully hemmed to the fashion fabric.

All that was left was to turn in the edges of the sides at the reticule's opening and hem them, though I did have to do a bit more seam whipping at the opening, since I winged (wung? Oh, those irregular verbs) the strap at the last minute. It had taken a year or two to find, hunting on and off, the right strap. I couldn't find any thick silk cord that was remotely affordable in the right color, found the artificial silk cords too bright and slick and shiny to work with the nearly matte shantung, and just didn't want ribbon.

Is a tasseled strap appropriate? Yes, but I've never seen a reticule strap so loaded with them. But, they're in the spirit of the 1790s: out-and-out luxury, outre attitudes, and caution to the winds.

So there it is. My only concern? The cardboard interior is just cereal box. If that's made of wood cellulose, which is likely, it may break down over time. With care, the rest is good for ages and ages.

All in all, this was a good project. Contained, full of challenges and design puzzles. I'd should have made the sides a little wider, and that cardboard should have been archival pasteboard, but that's small stuff. Here's to having a fun, fluffy, shiny reticule to carry.

Today I leave you with a little cat TV. Ciao until next we meet!


Sunday, July 24, 2022

Meet an Antique Edwardian Nysilk Skirt Braid Spool


Antique Nysilk brand skirt braid, part of a spool of 72 yards

Here's an interesting bit of history, sitting on the coffee table this afternoon. It's a large spool of Nysilk brand skirt braid.

In case you need a refresher, skirt braid was sewn to the bottom of the inside of a skirt's hem to protect the hem from wear; if wide enough it could actually bind the edge. It could also help in another way, which we will read about.

Here's a sample of the braid, below.

A section of the Nysilk skirt braid

Let's let the spool itself do some talking and tell us how it fit itself into women's lives, shall we?
The label at the top of the spool of Nysilk skirt braid. The bottom features an identical label. 

No Scratch!

"Does not deface the shoes", the header proclaims in a little banner at the top of the spool. Right off we can estimate that the braid was used on long skirts that regularly brushed the shoe tops. That means it's likely from before 19...say, 1914 and at latest about 1918-19 among more conservative women. 

"Made by improved methods and from a soft, superior material". Well, that's more marketing language that doesn't tell us what fiber or fibers are used. "Nysilk" is meant to sound silky and to underscore that the braid wouldn't scratch the shoe tops. It feels like a cotton and sure enough, in 1909 advertisement in The Delineator we learn that it's made of mercerized Sea Island cotton, hence the faint shine and the softness.


A March 1909 ad for Nysilk skirt braid on p. 472 of The Delineator.


It's indeed a braided fabric, not a woven one. Here is a closeup, below.

Closeup of Nysilk skirt braid, showing the braided structure.

Unless the marketing is pure fluff and the maker, The Narrow Fabric Co., is trying to convince purchasers that other brands of braid will rough up the shoes, then now we know that skirt braid could be scratchy and that a kid or patent or polished or silk finish on the shoes could be hurt by repetitive rubbing by the bottom of the skirt. Few of us like their shoes to look dinged up: most of us who have looked at our feet only to see a fresh scratch across a shoe is familiar with the annoyance it produces, the slight lessening of chic.

A Regal Finish

"Gives a regal finish to the skirt" says the very pretty little ribbon-style banner on the lower part of the spool. 

Oh, how I love to read this, for it hints at another of skirt braid's functions. These braids have a a bit of body to them: they're not loosely made or very thin, like so many of today's cotton tapes or bindings that we use in costuming today in all kinds of ways. 

Instead they resist just the littlest bit when bent, and the braid unwinds in pretty loops rather than collapses into a flaccid little heap. 

Here's the Nysilk skirt braid in action, in the short video below.

Can't see it embedded? Here's the YouTube link: https://youtube.com/shorts/1_ivB-VZhCg?feature=share 

You can guess how this sort of braid will help. Bound to the skirt hem, it will encourage the skirt hem on a long skirt into more handsome ripples. This was done with velvet or velveteen fabric, too, but a pre-made braid is easier to work with. You can rather imagine what it looks like by examining the illustration of the young woman in the Delineator ad. The end result is an improved hemline. Regal? Well...that may be a stretch, but tidier, anyhow.

You find skirt braid often on heavy skirts or wool skirts. One of the skirts in my collection has it in the form of brush braid...an 1890s skirt. That was another decade in which skirt braid was an especially popular thing. I haven't seen skirt braid on Edwardian summer muslin or linen skirts in my collection or in cotton print skirts when I look for it in pictures online. Which is not to say it wasn't used: I just haven't a scrap of evidence.

However, what with a wool or wool mix skirt being a standby for daily wear in women's skirts in all seasons, skirt braid was a common little helper in the sartorial part of many women's day-to-day environments.

Where Did the Spool Live?

The spool holds 72 yards and as we know from the Delineator ad, came in different colors to best blend in with the skirt fabric, because while this braid is black, and is labeled so on the spool, there's a space labeled "Col", for "color", and the word "black" stamped in a faded red ink in that space.

Who owned the spool? Here I can speculate based on the tear in the label over the hole that runs through the spool, meaning that the spool had likely been strung on a bar, so someone could unreel and cut what was needed. Was the skirt braid an inhabitant of a dressmaker's shop? 

The Delineator ad shows that it was sold in small packages of a few yards. This would be convenient for selling in a store to home seamstress purchasers, although larger amounts might be sold from the spool, mounted with other trims and notions in a shop or department store, too.

Here's the printed record, again. A little too laudatory, perhaps, but still: "The main product consists of shoe laces...but a great many skirt braids are made, which can be found on sale in nearly every retail store in the country". (Historical and Biographical Annals of Berks County, Pennsylvania, by Martin Luther Montgomery, 1909, p. 284.) So its original home was likely in a store or dressmaker.

The ad's presence in The Delineator means it was marketed to home seamstresses, but women who purchased skirts readymade that lacked the binding could have it added, as the ad recommended.

About the Maker

The Narrow Fabric Company in Reading, PA was founded by Henry Janssen and Ferdinand Thun in 1900 to make brush braid, elastic for garters, shoelaces and other braids. Built on a first, successful company the pair started in the 1890s, the new company was even more successful. The company was part of what became the Wyomissing Industries, which included Berkshire Knitting Mills, the originator of the fully fashioned hosiery knitting machine. 

For those of you interested in the history of textiles, the history of progressive worker relations and of planned communities, see the article "Two Gentlemen of Vision" by Alan Tabachnick in Pennsylvania Heritage" magazine, summer 1991. Sadly, it closed around 1991, a victim of outsourcing and less expensive imports. Its struggle for survival is chronicled in a moving little article blandly titled "Narrow Fabric Closes" in the Reading Eagle newspaper.

Hoping you enjoyed this little foray into the past.

In Other News...

I've examined the Past Pattern's 1901 Reception Gown pattern and have written out the process of making the Edwardian dress in the spots where I am departing from it, or mostly, anyhow, but time is not accommodating. The work schedule is truly fierce currently and significant time is spent ferrying children around or doing summer family things, like trips to the pool and of course, doing my part of the housekeeping. After all that, I'm too pooped to even think of doing anything else. That's okay. This is just a hobby, after all.

Wishing you a happy next few weeks!

Wednesday, June 15, 2022

Tour of an Extant Early Edwardian Silk Taffeta Gown: Some Bodice Details

In answer to a question about the early Edwardian extant bodice, part of the gown that's joined my collection, here are more details, including measurements (looking at you, Mrs. C!) 

If you're interested in minutiae with an eye to using what's there in your own work, read on. Otherwise, be warned...it's mostly up-close shots and numbers :)

Bodice front. Note that the elbow puffs are really visible, while the back-facing puffs at the cuffs are smaller.
Also note how the center front and back bodice bottom are almost at the same level, while the sides aren't quite as long...the bodice is not even across the bottom.

The back is closed by 20 buttons in a 15" length. Three buttons are missing. The bodice closure underlap, which is in one with the bodice front, 1 1/8" wide.


Each button is silk-covered (most buttons have lost the covering) and is about 1/4" in diameter.

The buttons are sewn through the silk and two layers of the lining. The lining has just over an extra inch width that was folded back towards the center of the lining, to provide a strong surface for the buttons to be attached to. The shank-style buttons are sewing with what looks like buttonhole twist, a strong, thick matte thread. Each shank is wrapped with thread many times to make a very strong connection and the end of the thread is tightly knotted on the back. The buttons are all sewn separately, not with the thread going from button to button, as in some bodices.


Settling the bodice opened flat, I've drawn a line approximately where the lower bodice would stop being visible when worn, with the bodice bottom tucked into the skirt. Some bodices included hooks or eyes that attached to their corresponding eye or hook to hold skirt and bodice together. No evidence -- holes or thread -- exists to show that was the case here.
 

As you can see from the pictures above, a bit of the cut of the bodice is apparent:

  • the front bodice piece and each of the two back bodice pieces are about the same length
  • the two side pieces are shorter
  • the center bottom of the front piece appears to be curved, and the tuck-in fabric less than an inch long, while it's about 3 inches at the back closure, decreasing towards the side pieces.
At first the variation in length confused me. While the sides might be shorter than front or back as men's shirts have been for some time, and thus be a sort of tradition, I think that pushing a lot of fabric into the side of a tight-fitting skirt would easily spoil the silhouette, so it has a practical purpose. Ditto for the front: the last thing the wearer wants is a front that's bulging with tucked-in fabric,even with a belt to cover part of it. In the back? Well, there can be a little more space there and the center back closure and belt offer cover, if you will.

Bodice Fashion Fabric Cut, Front, Side and Back pieces...


Not the sleeves right now. My brain is pooped.

What is the approximate shape of the pieces of fabric that make up the bodice? I am no good hand at measuring and drawing out a pattern from an assembled garment, and worse when it comes to a garment that's still in relatively good condition so that one cannot see the different layers. Yet here are a few measurements.

Back piece (left side with buttons)

  • 19": front piece length from top of front piece at underlap edge, down to bottom 
  • 2": top of front piece at neckline, to buttons, 1" buttons to end of collar, almost 3/4" width of underlap after end of collar, for a total of 3 3/4" approximately. Curved.
  • 19": length of front piece from top of shoulder at neckline to bottom
  • 7 1/4": width of front piece from juncture of armscye-shoulder juncture to edge of underlap
  • Tucks pattern from juncture of armscye-shoulder juncture to edge of underlap: 1 1/4" space, 5 tucks, each approximately (by no means perfectly even among them) 3/8" spaced; then 1" space, then 8 tucks ditto, then 1/2" to vertical line where all buttons are sewn, then approximately 1"
  • 5": length of front piece shoulder seam from armscye to neckline
  • 15 1/2": length of front piece running from end of shoulder seam at armscye straight to bottom
  • 5 3/4" long portion of front piece running in curve from side seam juncture to shoulder seam 
  • 10": side seam from armscye to bottom
  • 8" wide from corner where side seam meets armscye
  • 5": where tucks end, measured edge to side back seam. Includes self underlap that sticks out horizontally to hide any show-through when bodice is closed. Note: at this level a small inverse box pleat is taken near center bottom of tucks
  • 10": at bottom when stretched out

Back piece (right side with buttonholes) (has a different number of tucks!)

  • 19": front piece length from top of front piece at underlap edge, down to bottom 
  • 1" front piece at neckline from center edge to first tuck (buttonholes are put in this space); 1 1/2" top piece a neckline to neckline-shoulder seam junction. Curved./ 
  • 18 1/2": length of front piece from top of shoulder at neckline to bottom
  • 7": width of front piece from juncture of armscye-shoulder juncture to closure edge (there is a little fullness at this level that was hard to include, but I did my best
  • Tucks pattern from juncture of armscye-shoulder juncture to closure edge: 1 1/2" space, 6 (!) tucks, each approximately (by no means perfectly even among them) 3/8" spaced; then 1" space, then 8 tucks ditto, then 3/4"-1" (decreasing from top to bottom" space for the buttonholes, which are each 1/2" long, and shaped like a thin wedge, wider at closure edge than at inner end
  • 5 1/4": length of front piece shoulder seam from armscye to neckline
  • 16": very approximate length of front piece running from end of shoulder seam at armscye straight to bottom. Lots of fullness and wrinkling
  • 5 1/2" long portion of front piece running in curve from side seam juncture to shoulder seam 
  • ": side seam from armscye to bottom
  • 4 1/2" back piece width where tucks end, measured closure edge to side-back seam
  • 11":  at bottom when stretched out, plus including 1.5 turnback to create facing for closure

Side back pieces

  • They are an odd shape, with extension following armscye running upwards to neckline, that's about 3/4" wide and which is largely, but not entirely, hidden in a tuck. The extension about 6" long from where armscye curves, at end of tucks.
  • 19" long seam side piece seam from neckline to bottom -- joins to front piece
  • 12" armscye seam at top of side piece, very approximate
  • 10" long seam side piece from armscye to bottom -- joins to back piece
  • 4" side piece across bottom measured from side-back seam to side-front seam.
  • 2" each side arrow shape extension at bottom, with length in middle measured straight up to armscye of 12". Is about 1 1/2" deep.

Front piece

  • Appears to be an oblong-ish shape with concave curve out of the top for the neckline, and convex curve along bottom. It is extremely hard to measure.
  • 20" approximately from center neckline front to bottom...it's probably longer
  • 4 1/4" shoulder seam from front piece side edge to neckline (the other 3/4" belongs to the side piece)
  • 9 3/4-10" long neckline
  • 21" long (approximately) straight down from shoulder seam neckline join to bottom 
  • 7" longest 2 tucks in center front
  • tucks across front graduate slowly down in length down to 6"
  • tucks all face inwards on each side, so that looking at the front, the left tuck are sewn pressed to the center, while the right tucks are sewn pressed to the left

Collar band

  • 13" inches long finished; 3/4" wide finished (actual standing stock or other collar is missing)

Schematic of bodices, except for sleeves

Schematic of bodice pieces...and not at all to scale

Construction of front and back pieces


The tucks on the side pieces disappear into the armsyce, while the seam between front and side pieces is partially, but not all the way hidden by the tucks.

When I first posted this last night, I thought the strange side pieces were really odd. Yet this morning it hit me that this may be a clever case of dealing with a narrow-woven silk. The ad for it (I located the maker) says it's 24 inches and I think it likely as historically silk was woven more narrowly. 

Therefore, I think that a likely scenario is that the extensions to the side pieces are there because the silk is narrow, and rather than piecing the wide front, the needed width was made in the side pieces. Then they could have been cut roughly into shape, sewn together, and then tucked afterwards. Or perhaps I am missing another reason the reason for this design element.

They may have trimmed the pieces after tucking, leaving probably different seam allowances depending on which seam it was...we cannot see them, of course, but at under the armscye, for instance, I feel about 1/2" of fabric under there. The side seams and shoulder seams are wide and were whipped together with the lining allowances. This allows for alterations...which I cannot see were ever made.

Each back was tucked, as well, before cutting.

The Videos About the Gown

A whole series of YouTube videos about the gown is available. Watching them you get a better sense of how it looks on and how it looks in the light, although not a perfect one. The taffeta is wrinkled and I do not want to harm it by pressing. Nor I do not have the the best petticoat or drop skirt to put under it (although I do have two trained petticoats of this early part of the period. Many newspapers and magazines of this 1901-03 still recommended a band of hair canvas (haircloth) or book muslin (akin to tarlatan) in the hems to help the bottom frills kick out nicely.

Next Up...


If I get a chance soon, I will measure out the sleeves, too. Had extra time this evening while my husband and boys went to the pool.


Monday, June 13, 2022

Tour of an Early Edwardian Silk Taffeta Gown In Photos and Videos: The Bodice

Screenshot from one of the videos I made about the gown.

Last post I introduced you to a black taffeta Edwardian two-piece gown in my collection.

This and the next post look at it in more detail, in both photos and in eight YouTube videos. The gown is much easier to understand in motion in 3-D on a mannequin than flat in photos.

Find the videos about the entire gown on my YouTube channel at https://youtube.com/user/ZipZipInkspot.

No worries, I am not replacing this blog with videos, but in cases where video is a good means of communicating about a project, they are a helpful adjunct. 

In this case, I kept finding new parts of the gown to explore, so the planned four videos became eight.

Now for the additional photos, and some more information about the gown.

Bodice


The bodice is abundantly pintucked. The front pintucks give a sort of yoke effect and release into the lower bodice. Not much fabric is used up by the pintucks: it's the width of the fabric itself formed into center-facing pleats at bottom that gives the blouson, pigeon-front effect.

The front is longer than the back, which cut The Delineator called a "dip". With a straight-front corset, the front of a loose bodice would fall loosely naturally, while the hips, angled back, would cause the back itself to be shorter. Pulling the loose fabric close and moving the bulk of it to the front causes the pouch effect. This pouching is moderate and doesn't look as heavy as on some bodices because the fabric is crisp and stiff.


Detail of the front and its pouching.


The collar band is top-stitched over the raw neckline edge.

There is no evidence that the high collar that originally went with the gown was fixed to the band collar, as was sometimes the case. Instead, it would have been separate, and probably in matching black silk, either a taffeta or just perhaps a satin. It's tempting to think that it was also tucked, but we do not know.


The collar interior is lined with a very soft silk.


The silk lining is hand-hemmed in matching thread.


The fashion fabric at the bodice bottom is pleated with five center-facing pleats. Two on each side are nearly on top of one another to keep the pleats concentrated at the center.


Closeup of the fashion fabric bodice bottom. It is bound with a fine silk tape or ribbon. The tape is straight tabby woven and merely folded over the raw edge and running stitched to hold it on. The stitches aren't especially small.


Sleeve detail at the elbow: the pintucks give out to allow for a modest elbow puff, quite popular during 1901 and 1902. Then the tucks begin again and travel to the wrist. The sleeve isn't tight as in 1899 or 1900, but there is no sleeve puff and it isn't especially wide, either.


The puff, concentrated at the back of the sleeve, makes the sleeve a modest bishop sleeve. By 1903 such puffs could be quite large, but this may have been either a 1901-2 dress or a conservative cut.


The cuff is pintucked and finished with a natty arrow shape, and closes with a convenient snap.

Snaps were available on menswear in the 1880s. (See Wikipedia post). When they arrived on womenswear I do not know, but we usually think of them as a bit later. Both bodice and skirt use snaps and there is zero evidence in the fabric that hooks and eyes were ever used, and no buttonhole for a button. 


The inside of the bodice. It's lined with a tightly woven polished cotton, pinked and never hemmed to finish it. Fast to put together!

The lining fits tightly with darts.


Darts.


Lining seams are hand-overcast to finish them. Interestingly, in creamy white thread, neat and even work. The shoulder seams are handled similarly. 


The armscye appears to have been basted in a slightly heavy light brown thread, then stitched in black thread, and then seam binding added.

By the way, all machine stitching was made by a straight-stitch machine, not a chainstitch machine. The stitch size is small, and in places where it does not show, is not perfectly straight...in fact, it wanders some.


Note the silk tape or ribbon loop for hanging the bodice. It is very lightweight and pressed at the top. Barely looks used...


Sleeve lining, more brown thread, this time used to connect the fashion and lining layers together to finish them. The sleeve was constructed with the lining and fashion fabric treated as one piece -- flatlined -- not bag-lined.


The cuffs are faced and the wear on them shows that the garment was worn a good bit.


About the fabric: in the videos I wondered aloud if the fabric could have been Nearsilk, an early cellulose-based faux taffeta, because the heavy taffeta shows no signs of shattering. Many silks, especially thin ones, had a tendency to do this because they were treated with metallic salts during production. The metals tends to degrade the fabric over time. So does sunlight. However, even without a burn test, I was able to determine that the fabric is silk, and we even know the brand.

I did find an embroidered label integral to the selvage with "Princess Guaranteed Ta" hidden in a frill pleat.

On a long skirt seam is another label, "Guaranteed Stirling Silk Mfg Co". I looked it up in Google Books and found that the fabric is actually silk taffeta by a Stirling Manufacturing Company, whose fabric was sold in the US and perhaps elsewhere. I located two ads, a full-page ad in 1899 in Book News (volume 17) for the black silk fabric at John Wanamaker Department Store in Philadelphia, and the other a 1900 quarter page ad in another publication.  


Further, this company and another, by the similar name of Sterling, fought over the use of selvage labeling, it apparently being a new feature. The Sterling silk was said to be of lower quality, and the name and labeling chosen to mimic the Stirling silk. (New Jersey Equity Reports, volume 59).

The silk is wonderfully sturdy, so much so that I had thought it might be Nearsilk, an early faux taffeta. Quality indeed, and carefully stored out of the light -- it's not shattering! I am going to have to obtain storage for it that is equally dark and of archival quality. 

The gown came from an estate in Maine, and was sold to me by Pincushion Costuming in Canada. Whether it was made in Canada or the US is unknown. 

Next post in this series: Tour of an Extant Early Edwardian Silk Taffeta Gown: Some Bodice Details

Previous post in this series: A New Project and circa 1901-1903 Extant Gown to Share


Monday, May 23, 2022

A New Project and circa 1901-1903 Extant Gown to Share

The new aquisition, a 1901-03 gown

A happy chilly afternoon to you all. After some unexpectedly hot days, it's now unexpectedly cool and I am back in snuggy clothing...but no socks. Socks are banished in summertime, even when it's not summery.

We're not here to chat about the weather, however, but about historical clothes. So, what's on? A summer-early fall Edwardian project. Edwardian is where I started back in the aughts, save for a single 1950s dress, and it seems the time is ripe to reinvestigate the era.

Sitting in front of me is a new acquisition, a circa 1901-03 gown of silk taffeta purchased from Pincushion Costuming in Halifax, Canada. It's a hummer of a study dress, featuring many of the period's favorite fashion ideas: back bodice closure, pintucks, elbow puffs, modest bishop lower sleeves, faggoted and scalloped skirt panels ending in multiple delicious overlapping rows of "side-plaited" ruffles.

I have yet to settle on a tighter time period for it. That will depend on the cut, primarily, and if the ragged fuzzy hem edge is the remains of an interior silk puffing to give body to the hem when it rested on the ground, front and back, as was the fashion for more formal wear during these years. Hence the length of the skirt.

Re snaps: they were invented in the 1880s and were originally found on men's clothes. I have to go hunting through notions catalogs and advertisements to see if they were in use for women's clothes or whether they were added to this gown later.

Here are some more pictures:

The bodice front, with moderate pouching.
The stock collar appears to be missing.

The bodice back. It closes with many, many
fabric-covered shank buttons. The covering
has mostly worn off, revealing the metal base.
Note the modest bishop sleeves and elbow puffs.
Fashionable but not outre.

The skirt, side view. Fuller than 1900 and probably 1901.
Note the length: it's not street length, but a more
formal dress length. Wait until you see the
 construction. It's fascinating and slightly unexpected.

The skirt in detail. Note the faggoted seams and how the bottom of each panel is cut in a scallop. The layers of ruffles are pleated, with tightly grouped pleats every so often and a row of tiny box-pleated trimming at the bottom of each.

That will give you a taste. As usual, a deeper write-up of cut and construction will appear sometime during the next months.

Also as normal, I've been spending inordinate hours reading primary sources: newspapers, trade magazines, fashion magazines, dressmaking books, to become as acquainted as possible with the range of fashions and construction methods. Phone and computer are full of photos of extants. Time to share that, too. It has been a blast, not least because it's the next fashion era after the 1890s, the middle period of which this blog has been so focused for several years.

In any case, it's time to put everything to work on a gown. A purchase of one of Past Patterns' early 1980s releases, the 102 Simple Summer Gown, offers a starting point. Just not wanting to draft anything right now :)


Most of the materials are ready, the underpinnings are partially ready...so off we go.

Wait! What about the 1895 petticoat? That's pushed to late fall. Have all the materials ready to go for the last haul, but want a mental break from it.

Likewise I've put aside any Regency work. Was mocking up the bodice of the Figleaf 1810 dress pattern, but would rather work on something else. You all know how that goes.

As it's summer, posting will be spotty. The twins are in high school now and there will be a lot of ferrying them around, one to a camp counselor job and the other to school.

A Last Thought

Do any of you feel like we're falling into a deep and terrible pit? The shooting in Buffalo hit hard and our long unequal society feels ever horribly sicker. The carnage in Ukraine and elsewhere...the pandemic...climate change...  Dear Heaven, let us be your hands and feet and do what we can to heal the hurt around us.

Next post in this series: Tour of an Early Edwardian Gown In Photos and Videos: The Bodice